Bolo Úmido de Oreo: An Incredible Ultimate Recipe for Everyone
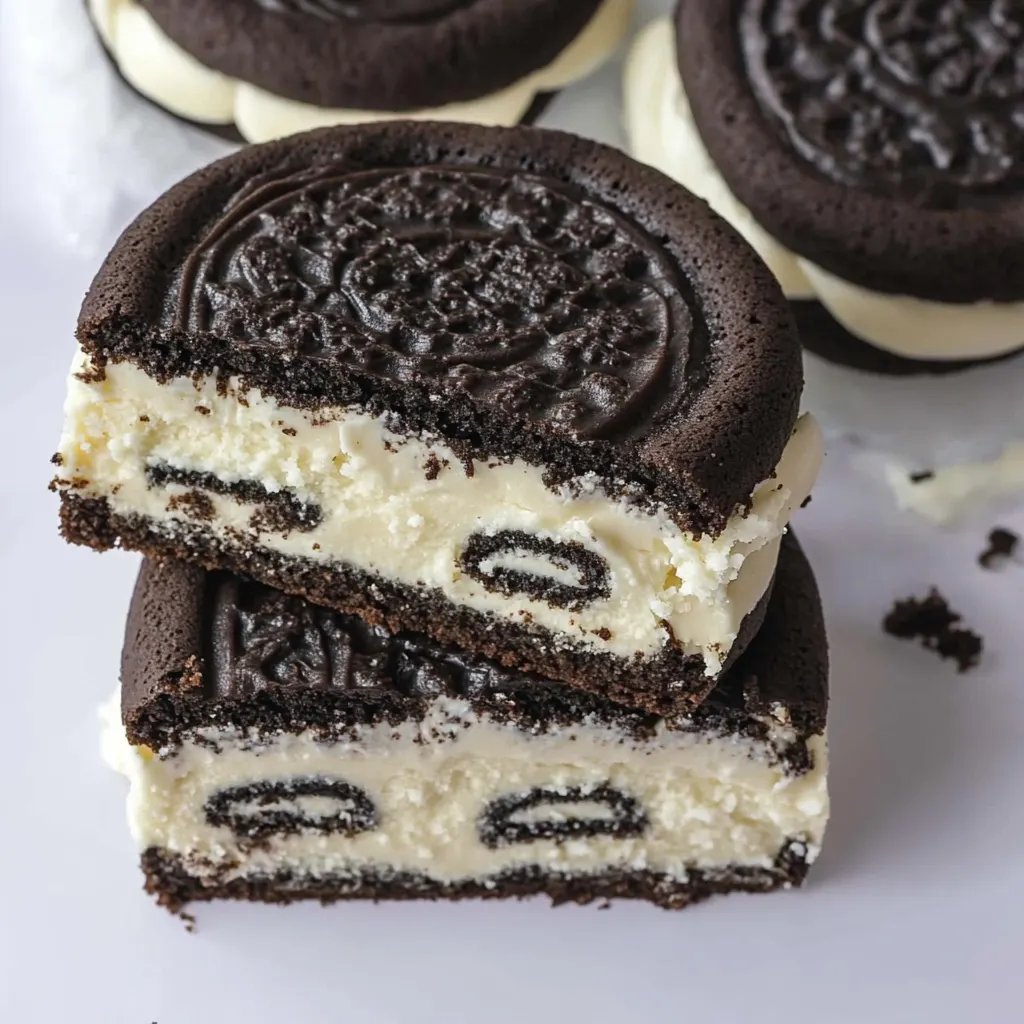
Bolo Úmido de Oreo is a delightful dessert that will surely satisfy your sweet cravings. If you're a fan of cookies and cream, this cake is about to become your go-to recipe. With its rich and moist texture, it captures the essence of Oreo cookies blended perfectly into a soft, fluffy cake. Whether it's a birthday celebration or a casual family gathering, this cake is guaranteed to impress and leave everyone wanting more.
Imagine indulging in a slice of Bolo Úmido de Oreo, where each bite delivers a chocolatey delight intertwined with creamy goodness. The stunning blend of flavors and textures is not just proof of excellent baking; it’s a celebration of simple ingredients coming together in harmony. In this article, you will discover why this recipe is a must-try, the preparation and cooking time, and step-by-step instructions to create your very own Bolo Úmido de Oreo at home.
This irresistible dessert can easily win the hearts of both kids and adults alike. The delightful flavors are sure to evoke joyful memories of sharing cookies with friends or enjoying late-night snacks on a rainy day. Let’s explore what makes Bolo Úmido de Oreo an absolute essential for your dessert repertoire!
Why You’ll Love This Recipe
Bolo Úmido de Oreo transcends traditional dessert boundaries, combining the universally loved Oreo cookie into a moist cake that is simply unforgettable. Here are some reasons why you will fall head over heels for this recipe:
- Easy to Make: The straightforward instructions allow novice bakers to create a delicious cake without any hassles.
- Rich Flavor: The combination of cookies, cream, and chocolate provides an indulgent taste experience that is hard to resist.
- Moist Texture: Thanks to the ingredients used, this cake stays wonderfully moist, ensuring every slice is irresistible.
- Versatile: Whether served at parties, gatherings, or just as an everyday treat, this cake fits every occasion.
- Minimal Ingredients: You likely already have most of the ingredients in your kitchen, making this recipe convenient and cost-effective.
- Customizable: Add additional toppings or fillings as per your preferences, such as whipped cream or chocolate ganache.
With all these amazing qualities, it’s no wonder Bolo Úmido de Oreo is a favorite amongst both bakers and dessert lovers. Each slice is more than just cake; it is a delightful experience!
Preparation and Cooking Time
Creating your very own Bolo Úmido de Oreo requires some time, but the result is well worth the wait. Here’s a breakdown of the estimated times involved in the process:
- Preparation Time: 20-30 minutes
- Cooking Time: 40-45 minutes
- Cooling Time: 15-20 minutes
In total, you can expect to dedicate about 1 hour and 15 minutes from start to finish. This time may vary based on your kitchen proficiency, but it's a good estimate that sets you on the right track.
Ingredients
- 2 cups all-purpose flour
- 1 ½ cups granulated sugar
- ½ cup unsweetened cocoa powder
- 1 cup whole milk
- ½ cup vegetable oil
- 3 large eggs
- 1 tablespoon baking powder
- ¼ teaspoon salt
- 1 tablespoon vanilla extract
- 1 cup crushed Oreo cookies
- ½ cup cream from Oreo filling (optional)
- Powdered sugar, for dusting (optional)
Step-by-Step Instructions
Creating a luscious Bolo Úmido de Oreo can be an enjoyable experience if you follow these easy steps:
- Preheat Oven: Start by preheating your oven to 350°F (175°C). Grease and flour a 9×13-inch baking pan.
- Mix Dry Ingredients: In a large mixing bowl, sift together the all-purpose flour, granulated sugar, cocoa powder, baking powder, and salt.
- Combine Wet Ingredients: In another bowl, whisk together the milk, vegetable oil, eggs, and vanilla extract until well combined.
- Combine Mixtures: Gradually pour the wet ingredients into the dry ingredients, stirring until smooth with no lumps.
- Add Oreo Cookies: Gently fold in the crushed Oreo cookies and, if desired, the cream filling to enhance the flavors.
- Pour Batter: Pour the combined batter evenly into the prepared baking pan.
- Bake: Place the pan in the preheated oven and bake for 40-45 minutes, checking with a toothpick until it comes out clean.
- Cool: Once baked, remove the cake from the oven and let it cool in the pan for 15 minutes before transferring it to a wire rack.
- Frost (Optional): If you'd like, you can top the cooled cake with whipped cream or a chocolate ganache, further elevating the dessert.
- Dust with Powdered Sugar: For an elegant touch, dust the top of the cake with powdered sugar before serving.
These steps will lead you to create a delicious Bolo Úmido de Oreo that is sure to become a staple in your baking repertoire.
How to Serve
Serving Bolo Úmido de Oreo is an opportunity to impress your guests. Here are some tips to make your presentation even more enjoyable:
- Presentation: Consider placing the cake on a decorative cake stand for an elevated look. A clean, simple background enhances its appearance.
- Accompaniments: Serve with a scoop of vanilla ice cream or fresh berries to complement the rich flavors.
- Slice Size: Serve generous slices, as this cake is sure to be a crowd-pleaser. Opt for smaller portions for those who might want seconds.
- Beverage Pairing: Pair with milk, coffee, or a dessert wine to elevate the tasting experience.
Taking the time to present your Bolo Úmido de Oreo thoughtfully will ensure that it becomes a memorable highlight of your gathering. Enjoy the smiles and compliments that come your way as everyone indulges in this wonderful dessert!
Additional Tips
- Use Quality Ingredients: Opt for fresh, high-quality Oreo cookies to enhance the cake's flavor.
- Mix Thoroughly: Ensure wet and dry ingredients are well combined to achieve a smooth batter, which helps in baking evenly.
- Check Oven Temperature: Use an oven thermometer to confirm your oven is calibrated correctly for proper baking results.
- Don’t Overmix: When incorporating the crushed Oreos into the batter, mix gently to maintain the cake's fluffy texture.
- Experiment with Frosting: If you want to add a twist, try cream cheese frosting or even a vanilla glaze to complement the rich chocolate flavor.
Recipe Variation
Looking to switch things up? Here are some fun variations to try with your Bolo Úmido de Oreo:
- Layered Cake: Bake the cake in two 9-inch round pans, stack them with creamy filling in between for a layered effect.
- Add Additional Flavors: Incorporate mint extract for a refreshing mint chocolate flavor, or switch the cocoa powder for a caramel or coffee variant.
- Nutty Crunch: Add chopped nuts, such as walnuts or pecans, to the batter for added texture and flavor.
- Chocolate Chips: Mix in semi-sweet chocolate chips along with the crushed Oreos for an extra chocolatey experience.
- Oreo Cookie Crust: Create a crust at the bottom of the cake using crumbled Oreo cookies mixed with butter for an added crunch.
Freezing and Storage
Keeping your Bolo Úmido de Oreo fresh is simple:
- Storage: Store the cake in an airtight container at room temperature for up to 3 days.
- Refrigeration: If you prefer, you can refrigerate it for up to 5 days; however, it’s best-served at room temperature.
- Freezing: Freeze the cake in slices wrapped tightly in plastic wrap for up to 3 months. Thaw in the refrigerator overnight before serving.
Special Equipment
For a smooth baking experience, ensure you have these essential tools handy:
- Mixing Bowls: For combining dry and wet ingredients.
- Electric Mixer: This tool makes mixing ingredients easier and helps achieve a fluffy batter.
- Measuring Cups and Spoons: Accurate measurements are key to the perfect cake.
- Baking Pan: A 9×13 inch pan works best for this recipe.
- Wire Rack: Ideal for cooling the cake evenly after baking.
Frequently Asked Questions
How do I know when the Bolo Úmido de Oreo is done?
Insert a toothpick into the center of the cake. If it comes out clean or with a few moist crumbs, the cake is done.
Can I add more Oreos?
Absolutely! Feel free to increase the amount of crushed Oreos for a chunkier texture and richer flavor.
What if I don't have whole milk?
You can substitute with 2% milk, but for a richer taste, try using buttermilk or plant-based milk like almond or oat.
Is it hard to make Bolo Úmido de Oreo gluten-free?
Not at all! Substitute all-purpose flour with a 1:1 gluten-free baking flour for an excellent gluten-free option.
Can I skip frosting the cake?
Yes! The cake is delicious on its own, but you can enjoy it with a dusting of powdered sugar for a simple finish.
Conclusion
Embracing the delightful flavors of a Bolo Úmido de Oreo is a rewarding endeavor for any dessert lover. This moist, decadent cake not only satisfies cravings but also serves as an excellent centerpiece for gatherings. Whether adorned with frosting or enjoyed as is, it's a dessert that quickly becomes unforgettable. All it takes are simple ingredients, a bit of patience, and a love for baking to create this irresistible treat in your own kitchen.